DSCN1355.JPG
Comments(0)
|
DSCN1356.JPG
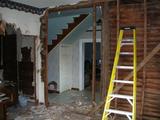
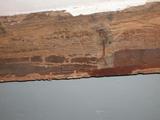
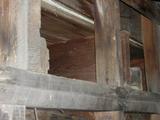
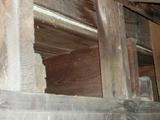
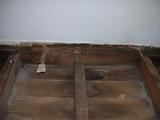
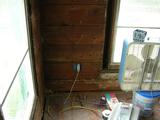
Brought down the planks on this wall. The sillplate above them either needs to be replaced or reinforced. Since removing and replacing this one critical support structure will be on the hard side of difficult, we're instead going to build a second wall next to the original which will support the joists above it and take most of the load off the original wall.
Comments(0)
|
DSCN1357.JPG

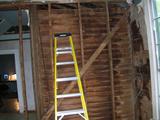
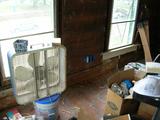
A plant growing out of the wall.
Comments(0)
|
DSCN1358.JPG
Comments(0)
|
DSCN1359.JPG
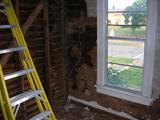
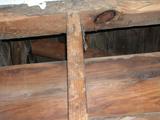
Termite munched sillplate.
Comments(0)
|
DSCN1360.JPG
Comments(0)
|
DSCN1361.JPG
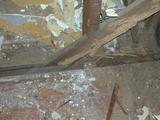
The base of the wall.
Comments(0)
|
DSCN1362.JPG
Comments(0)
|
DSCN1363.JPG
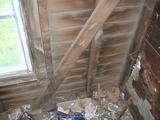
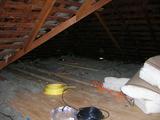
A peek above the front porch.
Comments(0)
|
DSCN1364.JPG
Comments(0)
|
DSCN1365.JPG
Comments(0)
|
DSCN1366.JPG
Comments(0)
|
DSCN1367.JPG
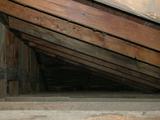
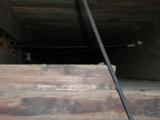
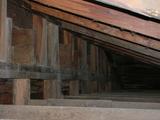
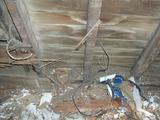
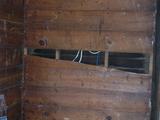
A peek down the... not sure what you'd call it.. the area between the ceiling of the first level and the floor of the second. This view is a look down the hallway from the south to the north. The knob & tube wiring going across feeds to the overhead light in the office.
Comments(0)
|
DSCN1368.JPG

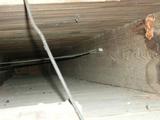
As far over as I could reach, looking down the area between the second and third studs. This one doesn't go as far since it hits the top of the stairwell.
Comments(0)
|
DSCN1369.JPG
Comments(0)
|
DSCN1372.JPG
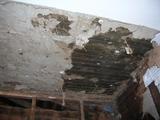
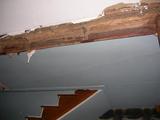
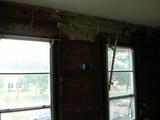
The ceiling in the living room. Most of the planks are in good shape, but a few feet of it near the east wall is munched up badly enough that it won't hold nails. Those planks will be torn out anyway to make room for the furdowns for the air conditioning ducts, so they'll be convienently removed. The remainder of the overhead plaster will be taken down and replaced, since it'll be tough matching it.
Comments(0)
|
DSCN1373.JPG
Comments(0)
|
DSCN1374.JPG
Comments(0)
|
DSCN1375.JPG
Comments(0)
|
DSCN1376.JPG

Comments(0)
|
DSCN1377.JPG

Comments(0)
|
DSCN1378.JPG
Comments(0)
|
DSCN1379.JPG
Comments(0)
|
DSCN1380.JPG
Comments(0)
|
DSCN1381.JPG
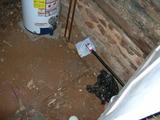
New gas line. Not operational yet. This runs from the meter on the northwest wall to the water heater in the old bathroom, completely under the house. I'll crawl the whole way and take more pictures on the next update.
Comments(0)
|
DSCN1382.JPG

This is actually shrinking. Several loads have been removed from this pile and no new crap is being added. It's hard to tell though.
Comments(0)
|
DSCN1384.JPG
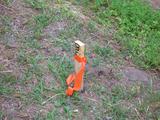
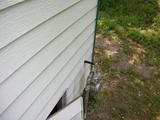
Stake marking where the new electrical pole will go. Yes, I get my very own pole, compliments of TXU. They're gonna charge me for everything else though. :(
Comments(0)
|
DSCN1385.JPG
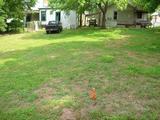
The new 200 amp electrical circuit will be installed on the west side of the house, on the wall just adjacent to the gas meter. We were hoping to put it on the east wall, but it would require some pretty massive pruning to get it through the trees.
Comments(0)
|
DSCN1386.JPG
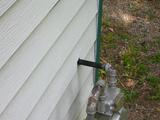
The end of the gas line.
Comments(0)
|
DSCN1387.JPG

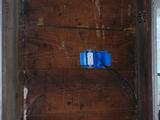
New outlets, with new wiring, into new breakers in a new panel. Just need the new drop.
Comments(0)
|
DSCN1388.JPG
Comments(0)
|
DSCN1389.JPG
Comments(0)
|
DSCN1390.JPG
Comments(0)
|
DSCN1391.JPG
Comments(0)
|
DSCN1392.JPG

Comments(0)
|
DSCN1393.JPG
Some cables were uncooperative, which required strategic removal of some planks to coax them into submission.
Comments(0)
|
DSCN1394.JPG

Comments(0)
|
DSCN1395.JPG
Lots of wires. This needs to be cleaned up a bit. I'll take more pictures next time.
Comments(0)
|
DSCN1396.JPG

Comments(0)
|
205pics&theme=0205pics&theme=0205pics&theme=0205pics&theme=0205pics&theme=0205pics&theme=0205pics&theme=0205pics&theme=0205pics&theme=0205pics&theme=0205pics&theme=0205pics&theme=0205pics&theme=0205pics&theme=0205pics&theme=0205pics&theme=0


